-
In the hands of a skilled artisan, a knife is not just a tool but a testament to precision and care. “Crafting Sharpness” delves into the artful world of knife sharpening, a skill that lies at the heart of numerous crafts – from the culinary arts to fine woodworking and outdoor survival. In this comprehensive guide, we unravel the nuances of keeping your blades in prime condition, exploring a variety of sharpening techniques and tools, each tailored to the specific needs of different blade types.
Whether you are a novice seeking to understand the basics or a seasoned craftsman aiming to refine your technique, this guide offers valuable insights into the world of knife sharpening. We begin with the traditional approach of using whetstones, renowned for their precision and effectiveness, and move through modern advancements like electric sharpeners, which offer efficiency and consistency. Our journey through the sharpening process is detailed and methodical, ensuring that you gain a complete understanding of how to maintain the optimal edge on your blades.
From the initial preparation of your sharpening tools to the final touches that define a blade’s sharpness, we cover every aspect of the process.
This guide not only equips you with the technical know-how but also instills a deeper appreciation for the craftsmanship involved in knife sharpening. As we navigate through various methods, tools, and tips, you’ll find yourself becoming not just a user of sharp tools but a true guardian of this age-old craft.
Hand-Crafted Sharpness
In ‘Hand-Crafted Sharpness’, we explore the intricate world of knife sharpening, a critical skill for any craftsman.
This section offers a deep dive into the various sharpening methods and tools essential for maintaining the optimal edge on your blades. We’ll cover everything from the traditional whetstones, favored for their precision, to the efficiency of modern electric sharpeners. Understanding these techniques is not just about keeping your knives sharp; it’s about mastering a crucial aspect of craftsmanship, ensuring your tools are always at peak performance for whatever task lies ahead.
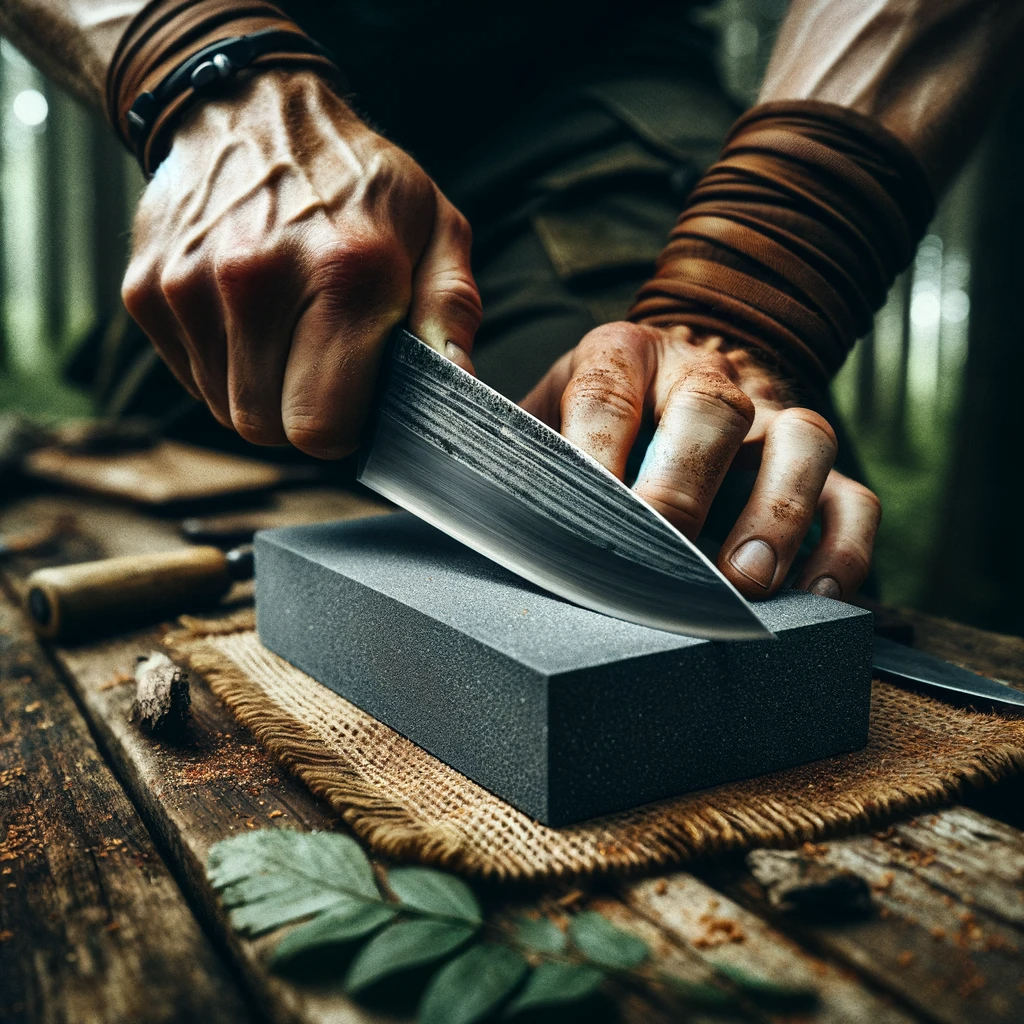
1. Whetstones: The Artisan’s Choice
In the realm of knife sharpening, whetstones are revered for their effectiveness and versatility. To ensure the best results, it’s crucial to prepare your whetstone correctly, whether it’s a water stone or an oil stone. Here’s how to get started:
Preparing the Whetstone
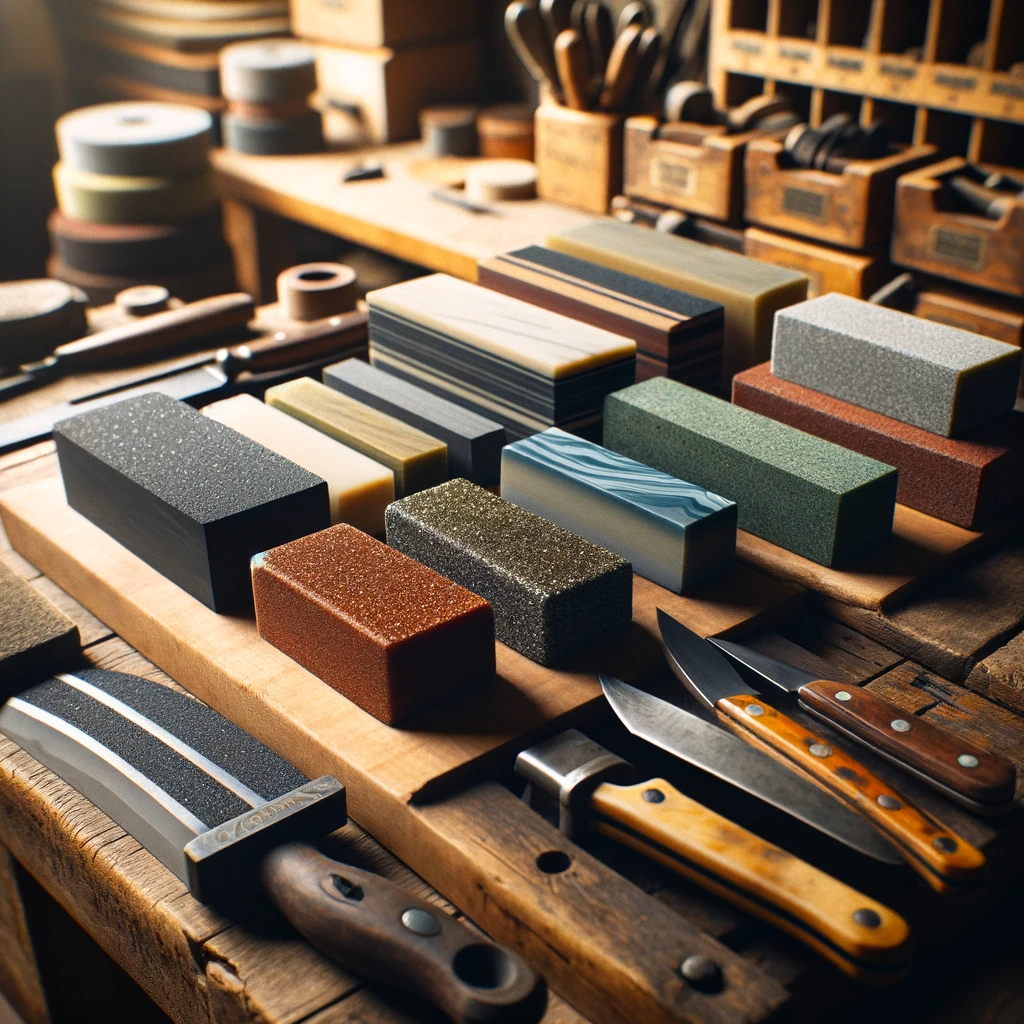
- Soak Water Stones: Before sharpening, it’s important to submerge water stones in water for about 10-15 minutes. This process saturates the stone, making it more effective at sharpening your blade.
- Lubricate Oil Stones: For oil stones, the preparation involves applying honing oil to the stone’s surface. The oil acts as a lubricant, facilitating smoother sharpening and helping to carry away the metal filings from the knife.
Oil stones, made from materials like Novaculite or Aluminum Oxide, are used with honing oil which helps in sharpening the blade smoothly while carrying away the metal filings.
With your whetstone properly prepared, you’re now ready to proceed to the sharpening process. This initial preparation step is essential for achieving the optimal sharpening conditions for your knife.
Continuing from the preparation of your whetstones, let’s delve into the sharpening process itself. This is where the real artistry of knife maintenance comes into play, requiring both technique and attention to detail.
Setting Process on a Whetstone
- Setting the Sharpening Angle:
- The angle at which you sharpen the knife is crucial. For Western knives, a 20-degree angle per side is common, while Japanese knives often use a 15-degree angle.
- If you’re unsure about maintaining the angle, consider using an angle guide. This tool can be extremely helpful in ensuring consistency, especially for beginners.
What is an Angle Guide?
An angle guide is a small tool designed to help you maintain a consistent angle between your knife and the sharpening stone. It’s often a simple, adjustable device that attaches to the spine of the knife blade.
The key to effective knife sharpening is maintaining a consistent angle throughout the sharpening process. The angle guide ensures that this angle is constant, which is crucial for achieving a sharp and even edge.
How to Use an Angle Guide
- Attachment: Clip or attach the angle guide to the spine (the non-cutting edge) of your knife. It’s typically positioned near the handle of the knife.
- Setting the Angle: Adjust the angle guide to the desired angle. Common angles are 15 degrees for Japanese knives and 20 degrees for Western knives. Some angle guides come pre-set at these common angles.
- Sharpening with the Guide: Place the knife with the attached angle guide against the whetstone. The guide will rest on the stone, keeping the blade at the correct angle. Sharpen the knife by sliding it across the stone, maintaining the angle as guided.
- Consistency: As you move the knife over the stone, the angle guide helps maintain the same angle, ensuring an evenly sharpened edge along the length of the blade.
Benefits of Using an Angle Guide
- For Beginners: It takes the guesswork out of maintaining the correct angle, making the sharpening process easier to learn.
- Consistency: Even for more experienced users, an angle guide can provide a quick and reliable way to ensure that the sharpening angle is uniform every time.
- Protection: It can also act as a barrier, preventing the knife from scratching the surface of the whetstone.
Limitations
- Not One-Size-Fits-All: While angle guides are adjustable, they might not fit every knife perfectly.
- Skill Development: Relying solely on an angle guide can limit the development of hand sharpening skills. It’s often recommended to learn to maintain the angle manually for greater control and understanding of the sharpening process.
For a good selection of angle guides, consider checking out this option.
Sharpening your knife
- Begin with the Coarse Grit Stone:
- If your knife is particularly dull or damaged, start with a coarse grit stone. This will reshape and reform the blade’s edge.
- Place the knife against the stone at the appropriate angle (20 degrees for Western knives and 15 degrees for Japanese knives).
- Use smooth, even strokes, moving the blade from the heel to the tip across the stone. Repeat this process several times, checking for a burr (a slight ridge on the edge) as an indicator to switch sides.
- Switch to the Medium Grit Stone:
- Once the edge is formed, move to a medium grit stone to begin refining the edge.
- Repeat the same process, maintaining the angle and using even strokes.
- Ensure that both sides of the blade are sharpened equally, maintaining the symmetry of the edge.
- Finish with the Fine Grit Stone:
- The final step in the sharpening process involves a fine grit stone, which hones and polishes the blade.
- Use lighter strokes than with the coarser stones, focusing on refining and smoothing the edge.
- This stage is crucial for achieving the razor-sharp finish desired in a well-sharpened knife.
- Check the Sharpness:
- After completing the sharpening process, test the blade for sharpness. This can be done by slicing through a piece of paper or by performing a precision cutting test.
- Clean the Knife and Stone:
- Once sharpening is complete, it’s important to clean both the knife and the whetstone. This removes any metal filings and maintains the condition of the sharpening stone.
The seamless integration of these stages involves patiently and meticulously working the knife across each stone, maintaining a consistent angle, and applying even pressure. As you move from coarser to finer grits, the focus shifts from shaping the edge to refining and polishing it. Each stage complements the previous one, gradually transforming a dull blade into a masterfully sharpened tool. The key is to understand that each grit has its unique role in the sharpening process, and skipping a stage can result in a less than optimal edge. With practice and attention to detail, you can master the art of integrating these grits for a perfectly sharpened knife.
Best Tips:
- Maintain Consistent Angle: This is key to achieving a sharp edge. An inconsistent angle can lead to an uneven edge.
- Use Gentle Pressure: Excessive force can damage the knife and the stone. Let the stone do the work.
- Consistent Stroke Count: Maintain the same number of strokes on each side of the blade for an even edge.
- Regular Maintenance: Regular honing will keep the knife sharp and reduce the need for frequent sharpening.
Recommended Tools:
- Whetstones:
- For Beginners: King KW65 1000/6000 Grit Combination Stone
- For Pros: Shapton Pro Series or Naniwa Chosera Stones
- Angle Guide: A simple tool to maintain the correct angle, ideal for beginners.
- Honing Rod: For regular maintenance between sharpening sessions.
- Leather Strop: For the final polishing and refinement of the edge.
With patience and practice, sharpening with a whetstone can be a highly rewarding process, allowing you to maintain your knives in top condition while enjoying the craftsmanship involved in this ancient skill.
For a variety of quality whetstones, consider these options:
Shapton Kuromaku Pro Ceramic Whetstone,
KING Whetstone Starter Set,
Naniwa Super Stone,
Premium 4 Side Grit 400/1000 3000/8000 Whetstone Sharpener Kit.2. Electric Sharpeners: Modern Efficiency
Electric sharpeners have revolutionized the way we approach tool maintenance, especially in environments where time is of the essence. These devices are designed to provide a quick and consistent edge, making them ideal for busy workshops and high-usage scenarios. While they may offer less artisanal control compared to manual sharpening methods, their value in a fast-paced setting is undeniable.
- Quick Sharpening Solution: Electric sharpeners are equipped with abrasive wheels or belts that sharpen and hone the blade in a matter of seconds. This rapid turnaround is crucial in professional settings where downtime on tools can hinder productivity.
- Uniform Edge Quality: One of the key benefits of electric sharpeners is their ability to produce a uniformly sharp edge every time. This consistency is vital in commercial workshops where maintaining the same level of sharpness across multiple tools is essential.
- Ease of Use: Electric sharpeners are user-friendly, requiring minimal skill or physical effort. This makes them accessible to individuals of all skill levels, ensuring that anyone in the workshop can maintain their tools effectively.
- Indispensable in High-Volume Settings: In busy craft environments or culinary kitchens where numerous tools need regular sharpening, electric sharpeners are indispensable. They save time and labor, allowing craftsmen and professionals to focus on their work without the interruption of prolonged sharpening sessions.
- Limitations and Considerations: While electric sharpeners are highly efficient, they do have limitations. They may not be suitable for tools that require a specific sharpening angle or those with unique blade geometries. Additionally, the speed and power of electric sharpeners mean they remove more metal from the blade, which could lead to quicker wear over time.
- Balancing Efficiency with Craftsmanship: For many professionals, electric sharpeners are used in tandem with traditional methods. They provide the initial edge, which can then be refined and personalized with manual honing or stropping. This hybrid approach balances efficiency with the fine control of artisanal sharpening techniques.
Quick Insight: Electric vs. Manual Sharpeners
Distinguishing electric sharpeners from manual diamond and ceramic ones is key. Electric sharpeners offer quick, automated sharpening, ideal for ease and efficiency. In contrast, manual diamond and ceramic sharpeners require more skill but offer greater control for precision sharpening. Understanding this helps you choose the right tool for your needs.
For an efficient electric knife sharpening solution, consider the Efficient Electric Knife Sharpener.
3. Honing Rods: Daily Maintenance
A honing rod is more than just a tool; it’s a craftsman’s daily companion, vital for maintaining a keen edge on knives and other cutting tools. This slender, rod-shaped tool is typically made of steel, ceramic, or diamond-coated materials, each offering unique benefits for edge maintenance. Regular use of a honing rod realigns the microscopic teeth on the edge of a blade without removing significant amounts of metal, preserving the blade’s integrity.
Using a honing rod regularly ensures that your tools are always in top condition, ready for precise work. It’s especially crucial for tasks that demand accuracy and finesse, like slicing delicate ingredients in the kitchen or making intricate cuts in woodworking. Honing is a quick and efficient way to maintain the edge’s sharpness between more thorough sharpening sessions, effectively prolonging the life of the blade and ensuring consistent performance.
Steps for Using a Honing Rod:
- Grip the Handle: Hold the honing rod by its handle, keeping the rod vertical and the tip securely placed on a non-slip surface.
- Find the Angle: Position the knife blade against the rod at the appropriate angle, usually around 15-20 degrees.
- Gentle Strokes: Starting from the heel of the blade (closest to the handle), gently pull the knife down and across the rod, moving towards the tip of the knife. Apply light pressure; the goal is to realign the edge, not to grind it away.
- Repeat on the Other Side: After one stroke on one side of the blade, switch to the other side and repeat the process. This ensures an even honing on both sides of the blade.
- Number of Strokes: Typically, 5-10 strokes on each side are sufficient. However, this can vary depending on the condition of the blade.
- Clean the Blade: After honing, it’s important to wipe the blade with a clean cloth to remove any metal filings that might have been dislodged during the process.
- Regular Maintenance: Integrate honing into your regular tool maintenance routine. For knives and similar tools, honing before each use is ideal.
For maintaining a razor-sharp edge on your knives, consider the High-Quality Honing Rod.
4. Diamond and Ceramic Tools: Precision Honing
Diamond and ceramic sharpeners hold a special place in the world of fine craftsmanship. Known for their unparalleled durability and precision, these sharpeners are essential for anyone who demands the utmost in edge refinement and honing. Diamond sharpeners, with their incredible hardness, are particularly effective for quickly reshaping and repairing a dull or damaged edge. They work wonders on the toughest of steels, making them a favorite for restoring and maintaining high-quality blades.
On the other hand, ceramic sharpeners are celebrated for their gentle, yet effective honing capabilities. They excel in fine-tuning an edge, smoothing out the microscopic serrations left by coarser sharpening tools. This results in an incredibly sharp and smooth edge, crucial for precision tasks. Ceramic’s fine abrasive quality is particularly beneficial for tools used in intricate work such as detailed woodworking, intricate carving, or fine culinary slicing.
Both diamond and ceramic sharpeners are valued not only for their effectiveness but also for their minimal removal of metal from the blade, preserving the integrity of the tools over time. Their ability to bring a blade to a mirror-like finish while maintaining its razor-sharp edge is what makes them indispensable in any craftsman’s toolkit. Whether you’re a professional chef, a woodworker, or an enthusiast in any field that requires the sharpest of tools, integrating diamond and ceramic sharpeners into your maintenance routine ensures that your tools are always ready for the most delicate and detailed tasks.
For a comprehensive sharpening solution, consider the Professional Knife Sharpener with Ceramic and Diamond Sharpener Kit.
5. Stropping: The Finishing Touch
Stropping is akin to the finishing touches a craftsman applies to their work. This critical step in knife sharpening goes beyond basic sharpening and honing. Stropping polishes and refines the blade’s edge, ensuring the sharpest, cleanest cuts in materials from fine wood veneers to gourmet ingredients.
Unlike sharpening or honing, stropping involves dragging the blade against a leather strop or a similar surface, aligning the microscopically thin edge of the blade at a molecular level. It removes any remaining burr (small bits of metal) left from sharpening and straightens the edge, providing that razor-sharp finish.
This process is essential for those who demand precision in their cutting tools, whether it’s for intricate woodworking, culinary arts, or any other discipline where the sharpness of the blade is paramount. With regular stropping, your knives not only achieve a superior edge but also maintain their peak performance longer, reducing the need for frequent sharpening.
- Prepare the Strop: Lay the leather strop on a flat, stable surface. If it’s a hanging strop, make sure it’s securely anchored. Some strops require a compound to be applied before use, so check if yours does and apply it if necessary.
- Position the Knife: Hold the knife at the same angle you would for sharpening – typically between 15 to 20 degrees. Ensure the entire edge of the blade will make contact with the strop.
- Leading with the Spine: Begin with the knife’s spine (the non-cutting edge) leading and the cutting edge trailing. This means you’ll be moving the knife in a direction away from the cutting edge.
- Gentle Strokes: Apply light pressure and slide the knife across the strop, away from the cutting edge, moving from the base of the blade (near the handle) to the tip. The gentle pressure is key; too much force can damage the strop or the blade.
- Flip and Repeat: Once you reach the end of the strop, flip the knife over so the other side of the blade is facing down, and repeat the process. This ensures an even stropping on both sides of the blade.
- Number of Strokes: The number of strokes depends on the blade and its condition. Generally, 10 to 20 strokes on each side are sufficient.
- Check the Edge: After stropping, check the blade’s sharpness. You should notice a significant improvement. If not, you may need to repeat the process or check if the knife needs more comprehensive sharpening.
- Clean the Blade: Wipe the blade with a soft, dry cloth to remove any residue from the stropping process.
- Maintain the Strop: After use, it’s important to maintain your strop. If it’s leather, occasionally treat it with a leather conditioner to keep it supple.
For knife enthusiasts and professionals alike, mastering the art of stropping is a worthwhile endeavor, elevating the functionality and longevity of your blades.
A leather strop is an essential tool in the knife sharpening process, often used as the final step to achieve a razor-sharp edge. Made from high-quality leather, it is designed to realign and polish the blade after sharpening and honing. Using a leather strop removes any remaining microscopic burrs and smooths the edge, enhancing the knife’s cutting efficiency. This tool is revered among craftsmen and culinary professionals for its ability to provide a superior edge finish, ensuring precision in every cut. Incorporating stropping into regular knife maintenance not only sharpens but also extends the life of the blade, making it a valuable investment for any serious knife user.

Conclusion: Mastering the Craft of Knife Maintenance
From selecting the right whetstones to mastering the precision of angle guides, and from the careful art of honing to the final touch of stropping, this guide has traversed the full journey of knife maintenance. Each step is crucial in its own right, contributing to the overall performance and longevity of your knives. Whether you’re a culinary enthusiast, a woodworking artisan, or someone who appreciates the finer tools in life, understanding and implementing these techniques elevates your skills and respects the tools of your trade.
Remember, the art of knife sharpening and maintenance is as much about preserving tradition as it is about ensuring functionality. Your knives are not just tools; they are extensions of your craft and passion. By caring for them through these detailed, time-honored methods, you’re not only ensuring that each cut, chop, or slice is perfect but also paying homage to the centuries-old crafts that these techniques are rooted in.
So take pride in this knowledge, apply these skills, and let the sharpness of your blades reflect the depth of your craftsmanship. Here’s to many years of precise cuts and well-maintained blades, a true testament to the art of knife maintenance.