-
In the wilderness, the primal skills of fire starting stands as the ultimate test of survival and adaptability. This guide is tailored for those who seek to embrace the wilderness with the confidence and skill of a seasoned adventurer. It’s a tribute to the unyielding spirit of survival, echoing the resilience and resourcefulness found in tales of human endurance against nature.
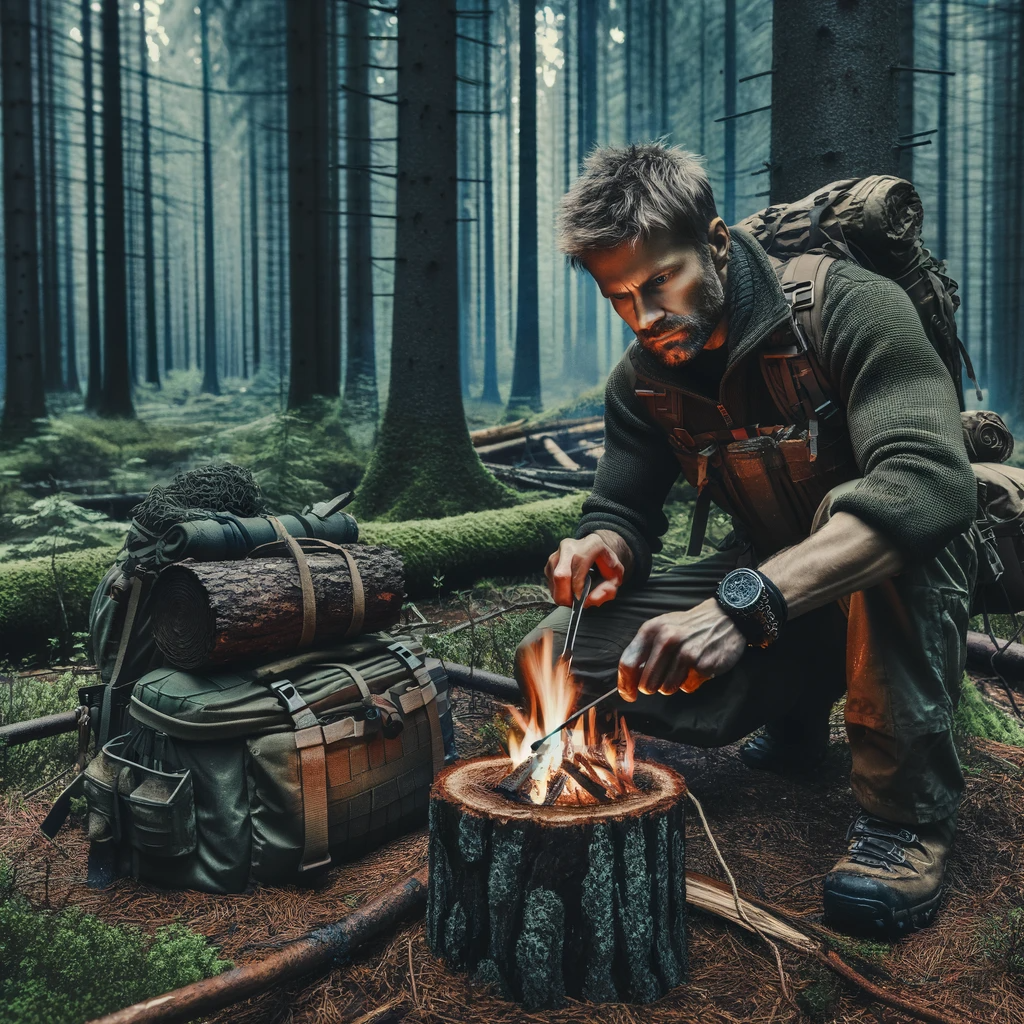
The mastery of fire is an ancient art, essential in the wilderness for warmth, safety, and cooking. This guide will take you through the journey of creating fire from scratch, exploring various methods suited for different environments. From the traditional flint and steel technique to the efficient use of modern fire starters, we provide practical tips and step-by-step instructions. You’ll learn how to identify and gather the best tinder and kindling, even in adverse conditions, ensuring that you can ignite a flame whenever needed.
This journey into fire starting is more than just learning survival skills; it’s about connecting with the environment and understanding the rhythms of nature. As you hone these skills, you’ll not only prepare yourself for outdoor adventures but also pay homage to the timeless practices of those who walked the wilds before us. So, step forward with this guide in hand, ready to conquer the challenges of the wilderness with newfound expertise and respect for the natural world.
Mastering Fire Starting
Understanding Fire Basics
Mastering the skill of fire starting begins with a fundamental understanding of fire itself. In this section, we’ll explore the core principles that govern the creation and maintenance of fire, ensuring that you’re equipped with the knowledge to start a fire in any wilderness scenario.
The Science of Fire:
- Heat, Fuel, and Oxygen: Fire is a chemical reaction known as combustion, requiring three key elements: heat, fuel, and oxygen. Heat ignites the fire, fuel sustains it, and oxygen feeds the flame. Understanding this triangle is crucial for both starting and controlling a fire.
- Sources of Heat: In the wilderness, heat can be generated through various methods, such as friction (e.g., rubbing two sticks together), striking a flint and steel, or using a lighter or matches. Each method has its own technique and ideal conditions for success.
- Choosing the Right Fuel: The fuel for your fire will primarily consist of tinder, kindling, and larger wood. Tinder is fine, dry material that catches fire easily, while kindling is slightly larger and helps the fire grow. Larger wood sustains the fire once it’s established.
The fuel you choose plays a crucial role in the success and longevity of your fire. Understanding the types of fuel – tinder, kindling, and larger wood – and how to effectively use them, ensures a steady, controllable blaze suitable for your needs.
Tinder: The Fire Starter
- Tinder is your fire’s initial fuel, and its quality can determine how easily your fire starts. Look for materials that are fine, dry, and easy to ignite. Examples include dry grass, leaves, birch bark, or pine needles. Commercial options like cotton balls soaked in petroleum jelly also work well.
- In wet conditions, finding dry tinder can be challenging. You might need to search under rocks or inside dead, standing trees where moisture hasn’t penetrated. Carrying waterproof tinder, such as fire starter cubes or dry lint, can be a lifesaver in damp environments.
Waterproof tinder options like fire starter cubes are specially designed to ignite quickly and sustain a flame even in wet conditions. Dry lint, often collected from the filter of a clothes dryer, is another excellent choice. It’s lightweight, easily compacted, and when stored in a waterproof container, remains dry and ready for use.
In more extreme and dire conditions, when conventional tinder sources are not available, resourcefulness becomes key. The insulation from your jacket, particularly if it’s made of natural materials like down or wool, can be used as an emergency tinder. While this should be a last resort, as it damages your clothing, it can be crucial for survival. Similarly, in a pinch, tightly rolled and shredded pieces of paper, or even the frayed ends of a cotton rope, can serve as an emergency tinder.
Other unconventional but effective tinder materials include:
- The inner bark of dead, dry trees, which can be shredded into fibrous strands.
- Waxy substances like chapstick or paraffin wax, which can help less flammable materials ignite.
- The fluff from cattails or seed down from various plants, often found in meadows or near water sources.
In survival scenarios, the ability to think creatively and use what’s available could be the key to successfully starting a fire. Remember, the goal is to ignite a flame and sustain it long enough to build a more substantial fire, so even less conventional materials can be invaluable in a time of need.
Kindling: The Fire Builder
- Kindling is the bridge between your tinder and the main fuel (larger wood). It consists of small sticks and twigs, ideally no thicker than your finger. These pieces should be dry and snap easily.
- Arrange your kindling over your lit tinder in a way that allows for airflow. Gradually increase the size of the kindling as the fire intensifies. An effective method is to start with a lean-to or teepee arrangement and then add more as the fire grows.
Larger Wood: The Fire Sustainer
- Once your fire is established, larger pieces of wood are needed to maintain it. These pieces should be dry and split to expose more surface area to the flames. The size of the wood should match the size of your fire; a small fire cannot effectively burn a large log.
- Hardwoods like oak and hickory burn longer and hotter, making them ideal for cooking and warmth. Softwoods like pine burn faster and are good for quick, hot fires, useful in emergency situations.
Fuel Management Tips:
- Always gather more fuel than you think you’ll need. Running out of wood in the middle of the night or during food preparation can be inconvenient and potentially dangerous.
- If you’re setting camp for multiple days, stockpile your wood in a dry place. This ensures you have a ready supply of dry fuel.
- Remember to respect the environment. Use fallen wood when possible, and avoid stripping bark from living trees, as this can harm the tree.
By carefully selecting and managing your fuel, from tinder to larger logs, you set the stage for a fire that meets your needs, whether for warmth, cooking, or signaling. Proper fuel choice and preparation make the difference between a struggling fire and a robust, reliable one.
Types of Fires for Different Environments
- Teepee Fire: Ideal for cooking, as it concentrates heat upwards. It’s easy to light and good for windy conditions.
- Star Fire: Efficient for fuel usage, making it ideal for dry environments where wood is scarce.
- Platform Fire: Perfect for wet conditions, as it elevates the fire above damp ground.
- Log Cabin Fire: Excellent for prolonged burning and heat distribution, suitable for campfires and signaling.

In the next subsections, we’ll delve into the tools and techniques for fire starting, gathering and preparing tinder and kindling, and the practical steps to building and igniting your fire, ensuring that you’re ready to bring warmth and light to your wilderness adventures.
Tools and Techniques for Fire Starting
Having a deep understanding of fire basics sets the stage for the practical application of fire starting. This subsection focuses on various tools and techniques you can use to ignite a fire, each with its unique advantages and suited for different situations.
Traditional Methods:
- Flint and Steel: This age-old method involves striking a piece of flint against steel to create sparks. The sparks are then directed onto a tinder bundle to ignite a fire. It requires skill and practice but is reliable in all weather conditions.
- Bow Drill: A more challenging but rewarding primitive technique. It involves using a bow to rotate a drill against a baseboard, generating enough friction and heat to create an ember. The ember is then carefully transferred to a tinder bundle.
The Bow Drill technique, a revered and ancient method of fire starting, requires skill and patience but offers a deeply rewarding experience. This method exemplifies the ingenious use of basic principles of physics and human ingenuity to harness the elements.
The Components of the Bow Drill:
- The Bow: A slightly curved stick, about the length of your arm, with a sturdy piece of cord or shoelace attached at both ends, creating a bow-like shape.
- The Drill (Spindle): A straight, smooth stick, usually about half the length of your bow. This is the piece you’ll rotate to create friction.
- The Baseboard (Fireboard): A flat piece of wood with a small notch carved into it. This is where you’ll place the bottom of your drill.
- The Bearing Block: A piece of harder wood or stone with a depression to hold the top of the drill, allowing it to spin freely while applying downward pressure.
How to Use the Bow Drill:
- Preparing the Fireboard: Carve a small depression in the fireboard. This is where the bottom of your spindle will rotate. Beside this depression, cut a V-shaped notch. This notch allows the wood dust created by friction to accumulate and eventually ignite.
- Stringing the Drill: Loop the spindle into the bowstring. The bow should be held with the string facing outward.
- Positioning: Kneel down and place one foot on the fireboard to keep it steady. Hold the bearing block with one hand on the top end of the spindle to apply pressure.
- Sawing Motion: Use a back-and-forth motion with the bow to rotate the spindle. This action generates friction between the spindle and the fireboard, creating heat and wood dust.
- Creating the Ember: As you continue this motion, an ember will form in the wood dust at the notch. This requires consistent speed and pressure.
- Transferring the Ember: Once the ember is glowing and smoking, carefully transfer it to your tinder bundle. Gently blow on it to ignite a flame.
Tips for Success with the Bow Drill:
- Wood Selection: Use dry, non-resinous wood for both the spindle and fireboard. Softwoods like cedar, willow, or poplar are often recommended for beginners.
- Practice and Patience: Mastering the bow drill takes practice. Don’t get discouraged if it doesn’t work on the first try.
- Smooth Operation: Ensure your bowstring is tight enough to rotate the spindle but not so tight that it creates excessive resistance.
- Maintaining Pressure: Consistent downward pressure is key to creating enough friction. Adjust your hand position on the bearing block for comfort and efficiency.
The Bow Drill is not just a fire-starting technique; it’s a connection to our ancestral roots and a testament to human resourcefulness. Mastering it not only prepares you for survival situations but also brings a sense of accomplishment and respect for ancient survival skills.
Modern Aids:
- Ferro Rods (Ferrocerium Rods): Compact and durable, ferro rods allow to produce sparks effortlessly when scraped with a striker. Unaffected by wet conditions, these rods offer a dependable fire-starting solution in all types of weather.
For those looking to add this reliable tool to their survival kit, ferro rods are available for purchase here.
- Waterproof Matches and Lighters: Always useful in a survival kit. Waterproof matches can be a lifesaver in damp environments, while lighters offer a quick and easy way to start a fire, though they can fail in extreme cold or when wet.
Technique Tips:
- Preparing Your Spark Bed: Before striking your flint or ferro rod, prepare a small nest of tinder where the sparks can land. Dry grass, cotton balls, or fine wood shavings work well.
- Striking Angle: When using flint and steel or a ferro rod, angle your striker at about 45 degrees for optimal spark production.
- Consistent Pressure: With the bow drill method, maintain consistent pressure and speed to generate enough heat for an ember.
Safety Considerations:
- Clear the Area: Ensure your fire starting area is clear of dry leaves, grass, or other flammable materials to prevent unintended spreading.
- Wind Direction: Be mindful of the wind direction to avoid blowing sparks or embers towards yourself or creating a fire hazard.
In the next subsection, we’ll explore the critical task of gathering and preparing tinder and kindling, which are the building blocks of any successful fire.
Gathering and Preparing Tinder and Kindling
The success of your fire largely depends on the quality of your tinder and kindling. This subsection will guide you through identifying, gathering, and preparing these crucial materials, ensuring your fire gets off to a roaring start.
Identifying and Collecting the Best Materials:
- Tinder: Look for materials that are fine, dry, and easy to ignite. Good natural tinder includes dry grass, leaves, bark (such as birch bark), and pine needles. In wet conditions, you may need to look under logs or inside tree bark for dry materials.
- Kindling: Once your tinder is lit, kindling helps to build the fire up to a stable state. Small twigs and branches, ideally finger-sized, are perfect. They should snap easily, indicating dryness.
Techniques for Dry and Wet Conditions
Dry Conditions
Gathering tinder and kindling is generally straightforward. Prioritize collecting from elevated surfaces like hanging branches or dead trees to avoid dampness. However, even in these conditions, it’s important to be strategic in your collection to ensure the best quality fuel for your fire.
Strategies for Gathering in Dry Conditions
- Elevated Surfaces: Focus on collecting materials from elevated areas. Dead branches that are still hanging on trees tend to be drier than those on the ground. These branches have been less exposed to moisture from the soil and have a better chance of being dry and ready to use.
- Sun-Exposed Areas: Look for areas that receive ample sunlight. Wood and other potential tinder materials found in sunny spots are more likely to be dry and suitable for fire starting.
- Dead Trees and Wood: Seek out standing dead trees, also known as “snags.” Wood from these trees is often dry and well-seasoned, making it excellent for both tinder and kindling.
- Testing Dryness: Check the dryness of your potential tinder and kindling by bending or snapping it. Dry wood will snap cleanly, while wet wood tends to bend or break unevenly.
Preparing Your Materials
- Breaking Down Larger Pieces: Use a knife or sharp tool to break down larger pieces of wood into smaller, more manageable pieces of kindling and tinder. This also helps to expose the dry inner wood.
- Creating Shavings: Use your knife to create wood shavings or feather sticks from larger pieces of wood. These shavings can be incredibly effective tinder, catching fire easily and burning hot.
- Protecting Your Collection: Once you’ve gathered your tinder and kindling, keep it in a dry place, especially if you’re collecting over an extended period or if there’s a chance of weather changes.
Wet Conditions
In wet conditions, finding suitable tinder and kindling for fire starting can be a challenge, but with the right techniques, you can still gather effective materials. The key is to look for sources of wood that have been protected from moisture and to use methods that expose dry inner layers of wood.
Finding Dry Wood in Wet Conditions:
- Standing Dead Wood: Look for dead trees or branches that are still standing. Even when it’s raining, the wood in standing dead trees is often dry inside, protected from direct moisture. This wood can be a valuable resource for both tinder and kindling.
- Split Open Logs: Fallen logs might be wet on the outside, but their interiors can be dry. By splitting open a log, you can access the dry wood inside. Use a hatchet, knife, or even a sharp stone to split the wood and reach the dry interior.
- Overhangs and Sheltered Areas: Check under natural overhangs, dense foliage, or fallen trees where the ground and materials may have been shielded from rain. These areas can be a good source of drier materials.
Preparing Tinder and Kindling from Wet Wood:
- Shaving Wood: Use a knife to shave off the wet outer layers of wood, revealing the dry inner wood. These shavings, or “feather sticks,” are thin enough to dry out quickly and catch fire more easily.
- Creating Fine Shavings: The finer the shavings, the better they will catch a spark or flame. Use your knife to create as fine shavings as possible, which will act as tinder.
- Using the Inner Bark of Trees: The inner bark of certain trees, like cedar or birch, can be dry even when the outer bark is wet. Carefully strip the inner bark and shred it into fibrous material, which can be used as tinder.
Additional Tips for Wet Conditions:
- Maximize Sun and Wind Exposure: If there’s any sunlight or breeze, use it to your advantage. Spread out your collected wood and shavings in a sunny or windy spot to help them dry out faster.
- Carrying Waterproof Tinder: In wet conditions, having waterproof tinder, such as fire starter cubes or specially treated tinder, can be invaluable. Always consider carrying some in your survival kit.
Preparing Your Materials:

- Creating a Tinder Bundle: Loosely bundle your tinder to allow for airflow. The bundle should be large enough to sustain flame until the kindling catches.
- Sorting Kindling: Organize your kindling by size, starting with the smallest pieces. This gradual size increase helps to build the fire without smothering it.
Building Your Fire Lay:
- Starting with Tinder: Place your tinder bundle where you intend to build your fire. Ensure it’s sheltered from the wind but has enough air circulation.
- Adding Kindling: Once the tinder is lit, gently add your smallest kindling, gradually increasing size as the fire grows.
By following these steps to gather and prepare your tinder and kindling, you’ll ensure a strong foundation for your fire. The next subsection will dive into the specifics of building and igniting your fire, taking this preparation to the next level of fire mastery.
Building and Igniting Your Fire
Once you have your tinder and kindling prepared, the next crucial step is to build and ignite your fire. This stage is where your preparation meets execution, and understanding the right techniques can make this process smooth and successful.
Building Your Fire Lay:
- Choosing the Right Layout: Depending on your needs (cooking, warmth, signaling), choose an appropriate fire lay. The teepee and log cabin are common layouts, each with its own advantages.
- Foundation: Start with a small pile of tinder in the center of your chosen fire location. If the ground is damp, lay down a platform of small sticks to keep your tinder dry.
- Structure: Build your chosen structure around the tinder to create a stable and efficient fire:
- Teepee Fire: Arrange kindling sticks in a cone shape around the tinder. This teepee structure concentrates heat upwards, making it ideal for cooking and efficient in windy conditions.
- Log Cabin Fire: Create a square frame of kindling around the tinder and build up in alternating layers, like a log cabin. This structure is excellent for prolonged burning and even heat distribution, suitable for campfires and signaling.
- Star (Indian) Fire: Place the tinder in the center and arrange larger sticks end-first around it, radiating outward like spokes of a wheel. This efficient layout allows for controlled burning and is ideal in areas where wood is scarce, as you can push the logs inward as needed.
- Platform (Raft) Fire: Construct a platform of sticks or logs laid side by side under the tinder. This method is especially effective in wet conditions, keeping the fire elevated above damp ground and is great for creating a consistent bed of coals.
- Airflow: Ensure your structure allows for airflow, as oxygen is a key component of fire. Don’t pack your materials too tightly.
Igniting Your Fire:
- Using Your Chosen Method: Whether you’re using a match, lighter, ferro rod, or a bow drill, the process of igniting your fire will depend on your chosen method. Aim to direct the flame or spark into the heart of your tinder pile.
- Gentle Blowing: Once the tinder catches, gently blow at the base of the fire to provide additional oxygen, which will help the fire grow. Be careful not to blow too hard, as this can extinguish the flames.
- Adding Fuel Gradually: As the tinder burns, start adding smaller pieces of kindling. Once these catch, add larger pieces progressively until the fire is at your desired size and strength.
Tips for a Successful Fire:
- Dryness is Key: Ensure all your fire materials are as dry as possible. Wet wood will smoke and is difficult to ignite.
- Wind Direction: Take note of the wind direction and use it to your advantage. A slight breeze can help feed your fire but be cautious of strong winds.
- Safety First: Always have a plan to extinguish the fire. Keep water, sand, or dirt nearby in case the fire needs to be put out quickly.
By following these steps, you will be able to build and ignite a fire efficiently in a variety of conditions and for various purposes. Remember, practice makes perfect, and being adaptable and resourceful are key traits in mastering the art of fire starting.
Safety and Ethics in Fire Building
In mastering the art of fire building, it’s crucial to prioritize safety and adhere to ethical practices. This ensures not only your well-being but also the preservation of the natural environments you enjoy.
Safety Guidelines
- Clear the Area: Before starting your fire, clear a wide area around your fire spot of any flammable materials like dry leaves or grass.
- Control the Size: Keep your fire manageable. A smaller, controlled fire is safer and easier to extinguish when needed.
- Water Source: Always have water, sand, or dirt nearby to extinguish the fire quickly in case of an emergency.
- Never Leave a Fire Unattended: A fire left alone can quickly become a wildfire. Always fully extinguish your fire before leaving the site.
Local Fire Regulations
Understanding and adhering to local fire regulations is a crucial aspect of responsible fire building. Different regions have varying rules based on factors like climate, ecosystem, and the risk of wildfires. Here’s a more detailed look at this important consideration:
Researching Local Regulations:
- Before Your Trip: Take the time to research the fire regulations of your destination. This information can often be found on local government or park websites, or by contacting local ranger stations.
- Seasonal Restrictions: Be aware that fire regulations can change with the seasons. Areas prone to dry conditions may have stricter rules during certain times of the year.
- Understanding the Rules: Regulations might include restrictions on the size of the fire, the use of fire rings or pits, and specific areas where fires are allowed or prohibited.
Complying with Restrictions:
- Prohibited Areas: In some regions, particularly those with high fire risk, open fires may be completely prohibited. Always respect these rules for the safety of the environment and yourself.
- Alternatives to Open Fires: In areas where open fires are not allowed, consider alternatives like portable stoves or fire pans that can be used safely with minimal impact on the environment.
- Permits: In certain locations, you might need a permit to build a fire. These are usually easy to obtain but are essential for legal and safe fire building.
Community Responsibility:
- Sharing Knowledge: If you’re traveling with others or meet fellow campers, share your knowledge about the local fire regulations. Educating others is a key part of maintaining safety and respecting the environment.
- Reporting Violations: If you observe others violating fire regulations, consider reporting it to the local authorities. This is not about policing fellow outdoorsmen, but about protecting the environment and everyone’s safety.
By familiarizing yourself with and adhering to local fire regulations, you contribute to the safety and preservation of natural areas. It’s a sign of respect for the environment and a commitment to being a responsible participant in the great outdoors.
For a comprehensive overview of open fire regulations across different states in the U.S., consult “Open Fire Regulations in the U.S.A. (by State)” provided by We Love Fire. This resource offers detailed insights into state-specific fire regulations, ensuring that your fire building practices are safe and compliant with local laws. Visit their website for more information: We Love Fire – Open Fire Regulations in the U.S.A..
Ethical Considerations
- Leave No Trace: Follow Leave No Trace principles by minimizing the impact of your fire. Use existing fire rings where available and avoid building fires in pristine, untouched areas.
- Use Fallen Wood: Collect only fallen wood for your fire, and avoid breaking branches from living trees, as this can harm the ecosystem.
- Fire Scar Prevention: To prevent lasting scars on the landscape, build fires on durable surfaces like sand or gravel, or use a fire pan.
Conclusion

The skill of fire building is a blend of art and science, a testament to human resourcefulness and our deep connection with nature. Through this guide, we’ve explored various techniques and structures for building fires, emphasizing the importance of preparation, execution, and understanding the environment.
As we conclude our journey in mastering fire building, it’s essential to remember that this skill is more than just a means to warmth and cooking; it’s a responsibility. Respecting nature, prioritizing safety, and practicing ethical fire building are as important as the techniques themselves. By adhering to these principles, you ensure that the wilderness remains a safe and beautiful place for all.
Whether you’re a seasoned adventurer or a budding outdoorsman, the ability to build a fire is an empowering skill. It connects you to the legacy of countless generations who have relied on this elemental force. As you continue to hone your skills, remember that every fire you build is a dialogue with nature, a balance of giving and taking, and a step closer to becoming a true steward of the wild.